This is the age of mass sharing websites. Everything you want people to watch, read or hear is uploaded straightaway without taking a second to blink. This is quite handy too. The amount of data you need to store in the secondary memory is reduced considerably as you already have a copy of it uploaded on the web. But the ease of uploading anything onto the web is highly dependent on the amount of data to be uploaded. While a blog or an article can be uploaded in a matter of seconds a video may take hours to be uploaded to a video sharing site. Thus data compression is the need of the hour. Most of the time you don’t really need to compress an image because the pixel ratio of the picture is not quite high as long as it’s clicked via a DSLR (Digital single-lens reflex) camera or any device depends on the resolution of the camera. You must have heard the term mega pixels coined every now and then. That signifies nothing but the resolution of the camera. You can check out the resolutions for better realization below.
256×256 – Found on very cheap cameras, this resolution is so low that the picture quality is almost always unacceptable. This is 65,000 total pixels.
640×480 – This is the low end on most “real” cameras. This resolution is ideal for e-mailing pictures or posting pictures on a Web site.
1216×912 – This is a “megapixel” image size — 1,109,000 total pixels — good for printing pictures.
1600×1200 – With almost 2 million total pixels, this is “high resolution.” You can print a 4×5 inch print taken at this resolution with the same quality that you would get from a photo lab.
2240×1680 – Found on 4 megapixel cameras — the current standard — this allows even larger printed photos, with good quality for prints up to 16×20 inches.
4064×2704 – A top-of-the-line digital camera with 11.1 megapixels takes pictures at this resolution. At this setting, you can create 13.5×9 inch prints with no loss of picture quality.
Why Do I need to compress an Image?
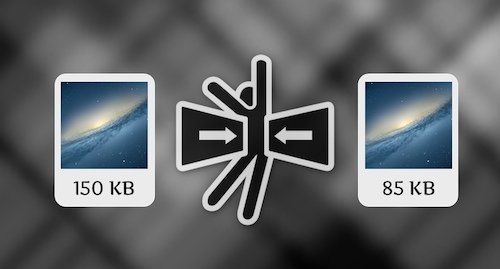
Very few people realize it but you need image compression every now and then. You must be uploading pictures to Facebook. Let’s say you need to upload an image. But Facebook also has limits to the image size you can upload. What do you do? You merely upload the image with about 10-20% compression and it will reduce your image size without much reduction in quality. Also you might be filling online forms, for colleges, schools, jobs and whatnot. The application form needs a passport sized photo to be attached of specific size and pixel aspect ratio. Again, the image compression and resizing comes into the picture. Also not all the people in this world have great internet speeds. Thus uploading images to Facebook, Picasa or hell, any other picture sharing website is a pain in the backside. And the higher the picture size the more time it’ll take to upload them. Thus, if you compress your image, the size reduces and so does the time to upload it.
Ways to Compress Image
There are plenty of ways to compress an image; different softwares different techniques to give different results as per your requirements. There are basically two types of compression methods: lossy and lossless. Lossy compression creates smaller files by discarding (losing) some information about the original image. It removes details and color changes it deems too small for the human eye to differentiate. Lossless compression, on the other hand, never discards any information about the original file. Thus the type of compression being used needs to be kept in mind.
Using Microsoft Office Picture Manager
You can use the Microsoft Office Picture Manager reduce both file size and picture dimensions based on how you intend to use the picture. This is one of the default softwares in Windows.
All you need to do is-
1) Select the picture you wish to compress and
2) On the Picture menu, click Compress Pictures.
3) Do one of the following:
- To compress your pictures for insertion into a document, under Compress for, click Documents.
- To compress your pictures for publication on a Web page, under Compress for, click Web pages.
- To compress your pictures for sending in an e-mail message, under Compress for, click E-mail message
4) Click Ok and you’re done.
Conversion into .JPG format
This is the right format for those photo images which must be very small files, for example, for web sites or for email. By converting the image into a .jpg format the image is compressed to perhaps only 1/10 of the size of the original data, which is a good thing when modems are involved. But there is one major point to be kept in mind while converting the image. JPG compression is lossy i.e. with loss to the quality of the picture. JPG compression has very high efficiency (relatively tiny files) because it is intentionally designed to be lossy, designed to give very small files without the requirement for full recoverability. Thus do not, and I can’t possibly stress this enough, overwrite your original, high resolution file.
By Using a Specialized Software for Image Compression
There are plenty of software going around that compress your image to any resolution or size you require. They are usually needed when multiple files are to be compressed quickly. Thus below are the top 4 softwares to compress your image files
ImageOptim 1.4.0
I wouldn’t recommend a lossy software to anyone, since I personally don’t really like my image quality to be reduced. Thus, ImageOptim 1.4.0 is your best bet. The program is all about loss-less compression – removing comments, color profiles and so on – rather than re-encoding or reducing the number of colors. As a result it won’t cut file sizes by quite as much as some of the competition, but at least you don’t have to worry about any loss in image quality. The interface of the program is quite easy just drag and drop the image you want to compress and the app will straightaway start compressing it. It isn’t the fastest image compressor around but with a fairly easy interface its surely one of the best.
PNGOUTWin
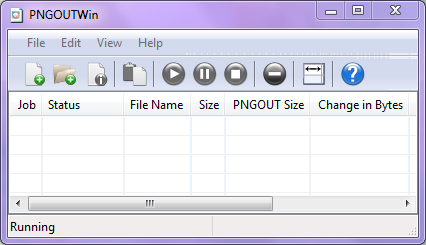
Another lossless program added to the list. Being command-line based and with no batch processing support, it will never be a favorite of a computer newbie. But the compression quality it gives (40.5% for PNG web graphics ) speaks loads of its strength. It’s a paid app with a pretty steep price tag of $14.95 (personal licence)/ $29.95 (corporate).
FileOptimizer
FileOptimizer is one of the best apps out there as far as compression is concerned. Not only will it compress image files for you it also can work with executable files, archives, Microsoft Office documents, PDF files, and the list goes on. Again as far as the picture compression is concerned the compression is lossless. It compresses a png image by a whopping by 42.2% – the best lossless compression performance in this group , the JPEG and GIF compression rates are more standard at 17.7% and 15.9% respectively.
YSmush.It
Smush.it is not really a software. It’s a web based compression tool that is quite handy. It really has no restrictions, no registration, no account creation, and no daily quotas. So all in all, Yahoo’s Smush is a great way to compress your images. The PNG compression is pretty effective at 35.3% and the GIFs loose an impressive 23.9% (the best lossless compression performance here).
jStrip
If you need to further compress your jpeg format files, the jStrip 3.3 is just the thing for you. It removes non-essential information: thumbnails, comments, color profiles, extra bytes at the beginning or end of the file, and assorted other bits and pieces. The image compression is nothing extra ordinary but the software overall is quick, smooth and easy to use. But just make sure you make a copy of the images you are working with because it replaces the original files with the compressed files.